Thursday, January 31, 2013

Light Alfredo Sauce

Meal: shrimp alfredo pasta with vegetables
Inspiration: Guiltless Alfredo Sauce

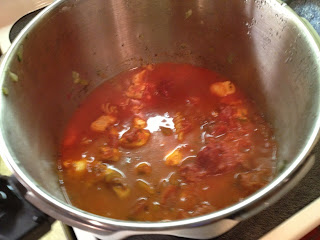
Cooking the alfredo sauce
I've made this alfredo sauce before and we totally love it.  We had shrimp in the freezer and some veggies that work well with a creamy sauce, so that's what I put together. Of course you can use it however you would like, serve it with breadsticks to pretend you're at Olive Garden.  Toss in some cooked chicken (leftovers or maybe from one of those rotisserie chickens) and some cooked broccoli.    I also like the idea of using it to top a white pizza -- with chicken, roasted red peppers, zucchini, tomato, spinach, etc.  And of course you can turn it into something else by adding some Cajun seasonings to have a creamy Cajun chicken pasta.  Or some Mexican seasoning, jarred jalapenos, chicken, cheddar, to make a copycat of the Uno's Pizzeria rattlesnake pasta. 


I actually make this recipe pretty much as written, which is really surprising because I like to use a recipe as inspiration rather than a written rule.  But of course some slight variations happen -- I used almond milk rather than cow milk and replaced one ounce of the cream cheese with a wedge of Laughing Cow light garlic & herb spread to add more flavor.

It helps to use an immersion/stick blender to make the sauce, put your ingredients in a glass measuring cup or the mixing beaker that comes with the blender and whiz it up.  Easier to clean than a full-size blender.

Pasta, shrimp, veggies, and sauce.
I cut up the shrimp into bite-size pieces and threw it in with the boiling pasta.  I made 6 ounces of dry pasta so we could have leftovers and it was the perfect amount of sauce and pasta.  I also threw in a bit of frozen spinach in the pasta water for the last minute.  Gotta remember to drain your pasta in a mesh sieve when you do that or all your spinach will float away with the water. 

And I added a package of frozen baby vegetable blend with sauce, the sort that you cook in the microwave.   Throw everything into the sauce pan and give it a toss to coat.  So delicious! 


There are leftovers!

Wanna Chat?

I turned off the 'leave a comment' feature, so if you want to share what you're thinking about this or anything else, drop me an email at jhk1013 (at) gmail.com. It's so much more cozy than a comment, plus we can have a real conversation!

Wednesday, January 30, 2013

Favorite Food Websites - Healthy Aperture

One of my favorite websites for healthy recipe inspiration is Healthy Aperture.  It's like Pinterest but it's a photo gallery of healthy recipes from blogs around the world.  It's all curated by actual people and they have several registered dieticians on their staff to help ensure they stay focused on healthy foods. The visuals are always beautiful, they have really high standards for what they will post on their website. 

You can browse by category, search within a category, or even just browse the homepage to see what's new.  They have helpful categories for special diets like Kosher and vegan, side dishes, slow cookers, and even chocolate! 

Wanna Chat?

I turned off the 'leave a comment' feature, so if you want to share what you're thinking about this or anything else, drop me an email at jhk1013 (at) gmail.com. It's so much more cozy than a comment, plus we can have a real conversation!

Monday, January 28, 2013

Menu Plan: Week of January 28

Here's my meal plan for the week.  Some of it is still up in the air, but at least I'm writing it down. 

Monday - frozen banana pancakes, scrambled eggs, leftover crustless pumpkin pie
Tuesday - salads, light shrimp alfredo pasta with baby vegetable blend
Wednesday - Cajun sausage-lentil soup
Thursday - father-in-law's retirement dinner
Friday - friends over for pizza
Saturday - maybe trying a new recipe in the pressure cooker
Sunday- might be having friends over for dinner

Wanna Chat?

I turned off the 'leave a comment' feature, so if you want to share what you're thinking about this or anything else, drop me an email at jhk1013 (at) gmail.com. It's so much more cozy than a comment, plus we can have a real conversation!

Sunday, January 27, 2013

Crustless Pumpkin Pie (Modified for Allergies)

Oat topping on pumpkin pie

Growing up, I was never thrilled about pumpkin pie.  I ate it the one time a year at Thanksgiving, but never cared if it was there or not.  But recently I found this crustless pumpkin pie recipe in the many pumpkin recipes that abound at the start of fall.  It sounded good for three reasons
  • I'm too lazy to make a crust (I've heard it's notoriously hard to get right)
  • the store-bought crusts are pretty lackluster
  • and crust has a lot of calories. 

I made crustless pumpkin pie to take to our friends' house for dinner on Friday night.  Their daughter is allergic to wheat, eggs, and peanuts, so I thought this would be a pretty good dessert that everybody could eat, once I made some modifications. 

Recipe Modifications

Typically I add a little wheat germ to the topping to add fiber and nutritious goodness, but that was out with the wheat allergy.  No big deal though, it wasn't in the original recipe anyway.

For the filling I replaced the eggs with a flax seed "egg" and used more flax to replace the flour.  It seemed like the flour was only there to make the mixture drier, so I figured it wouldn't be a problem.  But otherwise everything else went into the bowl as written.  I had panicky moments where I had to remind myself that she's only allergic to wheat, eggs, and peanuts, not dairy. 

I know pie is traditionally made in a pie plate, but my pie plate doesn't have a cover and I hate transferring leftovers to a separate container.  So I make my pie in two small rectangle Pyrex containers and a round 1 quart Pyrex, they have rubber lids and so they can stack easily in the fridge.  Plus splitting it up into multiple containers bakes quicker, only 40 minutes versus the 50-55 for a pie plate.

Wanna Chat?

I turned off the 'leave a comment' feature, so if you want to share what you're thinking about this or anything else, drop me an email at jhk1013 (at) gmail.com. It's so much more cozy than a comment, plus we can have a real conversation!

Saturday, January 26, 2013

Fast Butternut Squash in the Microwave

Butternut squash is so easy to make in the microwave that I've never made it any other way.  I previously thought acorn squash was the best, but then I tried butternut squash and found that I preferred it's solid texture more than the acorn squash's stringy texture. 

Picking a Butternut

Butternut squash
courtesy of Philly Food Lovers.com
Here is a picture of a butternut squash, it has a long neck and a bulb at one end.  There are seeds and some squishy stuff at the bulb end, so I think that the neck is the best part (most food with least amount of work).  I look for squash that have a big, thick neck and a small bulb end.  This one here is a pretty good example, the flesh is solid and pumpkin-orange colored and there aren't many seeds. 

Prep the Squash

Wash your squash off thoroughly by rubbing the your hands along the surface under running water.  Yes, I know you're going to cut the skin off, but cutting through the skin into the flesh can transfer germy grossness to the inside, and you don't want that.   I make a vinegar-water solution that I spray on vegetables to wash them, but I'll tell you about that at a later date. 

Cut the squash where it changes from neck to bulb.  Take the neck and put the flat end down on the cutting board and run your knife down the sides to peel the skin off.  Cut the flesh into bite-size cubes and put them into a large, flat but tall microwave safe dish (I use a Pyrex baking dish).  Now you have to deal with the bulb end.  Scoop out the seeds and guts with a sharp-edged spoon and put the flat side down on the cutting board and run your knife down the edges to cut off the skin.  Cut it into bite-sized pieces as well and throw them into the cooking dish. 

You can also cut the squash in half the long way (as shown in the picture), scoop the seeds out, and then leave the skin on.  You would scoop the flesh out after cooking.  I've never tried it that way because I'm afraid the skin won't come off easily and then find out it would have been better to do it the other way.  Go for it!   

Seasoning and Cooking

I like squash with a bit of butter and curry seasoning, so I put about 2 teaspoons of butter on the raw pieces and sprinkle on a little curry powder.  I've tried making squash without the curry powder, but the flavor seems too bland.  Then I cover the squash with plastic wrap, leaving a small opening for it to vent.  This is why I aim for a tall-but-flat dish, I don't want the plastic wrap touching my food as it cooks.  Then I cook it on high power for 15-20 minutes.  Start with 15 minutes, it's likely that it will be done.  I only add a little sprinkle of salt at the table. 

Wanna Chat?

I turned off the 'leave a comment' feature, so if you want to share what you're thinking about this or anything else, drop me an email at jhk1013 (at) gmail.com. It's so much more cozy than a comment, plus we can have a real conversation!

Friday, January 25, 2013

Adventures with a Beef Brisket in the Pressure Cooker

Raw brisket in the steamer basket.
My second pressure cooker meal was beef brisket.  It seemed that pressure cooker cookbooks are fond of brisket recipes, they have more brisket recipes that a standard cookbook would have.  I've never made brisket before other than a corned beef brisket in the slow cooker for St Patrick's Day, so I picked up a brisket at a recent visit to the grocery store.  I should have paid more attention, a brisket recipe takes 55 minutes of cooking, which is less than the typical 3 hours in the oven it would normally take to make, but that's a long time for a weeknight dinner.

What Recipe Should I Make?

Our kitchen is currently out of onions and it seemed that every recipe I found needed onions.  So I went with the simplest recipe from my Pressure Perfect cookbook, the brisket cooks above the water and after 55 minutes of cooking, you use two forks to shred the meat and put barbeque sauce on it.  Well, brisket and barbeque sauce are two things I've got, so that's a winner recipe. 

I cut my 2.8 pound beef brisket into four pieces and trimmed off most the fat. I put about 3 cups of water in the bottom of the pressure cooker, put the rack on top, and then put the steamer basket on the rack. Before setting up the pressure cooker with the rack, I always make sure it's already on the stove because the rack can easily slide around, which would tip an edge of the basket into the water, getting some ingredients wet. 

Seasonings. 
I put the chunks of meat in the pressure cooker basket and seasoned it with low-sodium soy sauce, celery seed, garlic powder, tomato powder, and onion powder. 


Cooked meat.  Shrinkage.


As you can see, the meat shrank quite a bit.  I always forget about that. 

The meat was a little difficult to shred, but it worked.  I think brisket might be stronger than me. 

The meat was tasty, but the seasonings I added weren't noticeable.  I probably should have marinated the meat for a few hours after cutting it into chunks, I'll try that next time. 

Shredded brisket.

Husband Jeff ate his barbeque sauced brisket on a dinner roll, while Sonny D and I ate ours right off the plate.  I think we have a new fan of Smoky Jon's barbeque sauce, Sonny D liked to delicately dip his bits of meat in it. 

Verdict

We all liked the meat a lot, but for a weeknight I'll make a quicker dish and prep the ingredients ahead of time. 


Wanna Chat?

I turned off the 'leave a comment' feature, so if you want to share what you're thinking about this or anything else, drop me an email at jhk1013 (at) gmail.com. It's so much more cozy than a comment, plus we can have a real conversation!

Wednesday, January 23, 2013

My Food Goals for 2013

I decided to write down some of my food goals for 2013.  I typically make standard New Year's resolutions and I try to stick by them, but these are even more fun since I get to do some experimenting in the kitchen.  
  • Try cooking with new foods like fennel, parsnips, rutabaga, turnips.
  • Try out my new pressure cooker, got one for Christmas along with a couple of cookbooks. You can read about my first pressure cooker meal, chicken cacciatore.  I'm on my way to many more dishes since the first one was a definite success.
  • Make a whole beef tenderloin.
  • Buy more local fruits, veggies, meat, and eggs.
  • Toast oats for oatmeal.  Make tea-infused oatmeal.  Make grapefruit oatmeal.
  • Make chicken livers (high in iron).   
  • Make some store-bought items at home -
    • potato chips
    • quick pickles
    • mayo
    • buttermilk dressing
    • vanilla extract
    • Veggie burgers
    • corn tortillas
    • pita bread
    • maybe hamburger buns
    • marshmallows

Wanna Chat?

I turned off the 'leave a comment' feature, so if you want to share what you're thinking about this or anything else, drop me an email at jhk1013 (at) gmail.com. It's so much more cozy than a comment, plus we can have a real conversation!

Tuesday, January 22, 2013

Can I Talk You Into Making Lima Beans?

Lima bean ingredients.

Lima Beans

On Tuesday night I made lima beans to go with broiled swai Parmesan.  I know lima beans are a classic 'ewww' food, but hear me out, they're so delicious.


My inspiration is this recipe, Farmer's Market Lima Beans. Typically you boil the beans in stock, diced onion, and some ham or pork, but the onion in my crisper drawer was too far gone and we didn't have any ham or pork.  The original recipe is great, but I had to improvise.

I boiled half a bag of beans in a can of chicken stock with some minced jarred garlic, onion powder, fresh black pepper, a tablespoon of butter, and a little herbal spice blend.  They cook on the stove for about 25 minutes.

The beans come out so tender and silky, not dry or mealy.

 We scoop them out without the liquid and maybe add a little salt if you think they need them.  
Beans cooking in the pot.

Lima beans on my plate.

Broiled Swai Parmesan

Broiled swai Parmesan

The fish was a variation on the original recipe as well.  I thought it was overkill to use both butter and mayo, so I used light mayo with freshly grated Parmesan, dried basil, black pepper, bottled lemon juice, celery seed, and dried lemon peel (got these last two for Christmas). 


I love that the fish is broiled, I always forget about the broiler.  It's so hot and quick, and perfect for fish.


Husband Jeff also had a salad for dinner, but I passed on that because I had a big lunch out.  He and sonny D had toasted crumpets as well.  Sonny D ate a filet and a half of fish, that's a lot!  So this variation gets his approval, too.

Wanna Chat?

I turned off the 'leave a comment' feature, so if you want to share what you're thinking about this or anything else, drop me an email at jhk1013 (at) gmail.com. It's so much more cozy than a comment, plus we can have a real conversation!

Monday, January 21, 2013

Intro to My Menu Planning: Week of January 21

I love going grocery shopping, inventorying my regular freezer and chest freezer, and planning out what meals I'm going to make for the week.  I'll sit down on a Sunday with a pad of paper, our calendar, and our freezer/fresh inventory.  I write out the days of the week, what plans we've got each day that might have an affect on dinner or our evening, and try to figure out what we need to eat up first, what I should take out the freezer to thaw, etc.  Also, I'll note down meals that use ingredients we have and use that list to work from.  I aim for healthy, interesting meals.  I try hard to use up what we've already got in the house, pantry, freezer, etc. without needing to make special trips to the grocery store for specific ingredients. Then once I've got everything figured out, I transcribe the plans to the giant chalkboard in our kitchen. 

By planning ahead, I find that it prevents me from having any last-minute worries about what we're going to have for dinner.  And I can get the ingredients and equipment out ahead of time and prep everything so it's quicker. 

Recently I was a little neglectful in finishing my weekly menu plans and I found out how much it really helps to plan things out.  I wrote down some ideas for meals, but I never bothered to figure out the exact meals for each day.  I ended up being completely blasé about what we ate, and our meals suffered.  Usually when that happens, all I want to do is go out for meals even though I know that's unhealthy and costs more.

Menu this week

M - the boys are eating alone so they can do whatever they want, but it'll probably be pizza or melt sandwiches since those are Husband Jeff's favorites
T - broiled Parmesan fish, lima beans
W - banana pancakes from the freezer, veggie frittata
R - brisket in the slow cooker, heat-and-serve dinner rolls, butternut squash
F - pizza with friends
S - special Korean lunar new year meal
S -  typically something light and easy like soup and sandwiches

Wanna Chat?

I turned off the 'leave a comment' feature, so if you want to share what you're thinking about this or anything else, drop me an email at jhk1013 (at) gmail.com. It's so much more cozy than a comment, plus we can have a real conversation!

Sunday, January 20, 2013

My Love for Oatmeal

I am in love with oatmeal for breakfast.  I didn't grow up an oatmeal girl, it happened by chance.  One morning a few years ago we ran out of milk and I was at a loss since cold cereal was my standard breakfast.  I rummaged through the cupboards, found a container with the smiling Quaker on it, and I figured it sounded like an ok choice.  That morning was a success, so I continued on with more oats.  I've pretty much only eaten oats for breakfast at home ever since.  Sometimes I'll even have it for lunch after already having it for breakfast that morning.  Occasionally I dream about what it would be like if I was single, I would probably eat oatmeal for every meal for many days! 

Flavors & Variations

Those first couple years I think I pretty much only ate oatmeal with chopped almonds, a couple tablespoons of brown sugar, and milk on top.  That was great until I started watching what I ate and realized how many calories that was, I think it was 500+ calories.

Oatmeal is a great choice, so I decided to investigate how to make it healthier and better for me.  I started experimenting with wheat bran, wheat germ, oat bran, flax seed meal, hemp seeds, quinoa, barley, steel-cut oats, and other things to mix in for flavor, health, and variety.  I also experiment with various flavors.  I've made carrot cake oatmeal, cranberry (dried and fresh), chocolate, gingerbread, peanut butter, banana, cinnamon-raisin, peach, apple cinnamon, prunes, strawberry, grapefruit, etc.

Another variation is baked oatmeal, you take the same basic concept and mix in some eggs and whatever else, and bake it in the oven.  I like it thick like a cake, I cut it into squares.  I make this ahead of time and then reheat pieces for breakfast.  

I've read that soaking oats makes them more digestable, so most of the time I start my oats the night before.  It doesn't really take any more time (probably actually less overall), but you do have to plan ahead. They soak up more water when you make them ahead of time, which is good because I find that I need a large volume of food to feel satisfied.   I also will make a big batch in a large casserole dish and then dole it out into separate containers for the next few days. 

My Recipe for Oats

1/4 cup oats
1 T chia seeds
3/4 cup water

I mix these ingredients together in a tall bowl and cook it for one minute in the microwave.  Stir, and cook for another minute.  Then I let it sit overnight in the microwave.  I know, it seems weird, but I've never had a problem letting it sit out like that.

Then in the morning I heat it up for another two minutes, stirring after each minute.  Then I add a hefty sprinkle of Penzey's Tung Hing cinnamon and add whatever stir-ins I'm feeling at the moment, sometimes a tablespoon of Grape-nuts cereal for texture, ground flax seeds or hemp seeds for protein, a diced half banana, etc.  I like my oatmeal really thick, so I'll add wheat bran if the mixture is too wet.  Then I add what I call a "float" -- a tablespoon of non-dairy creamer on top and two tablespoons of almond milk to cool it down, and dig in.  The float sits on top and sweetens the mixture, otherwise I don't add any sugar. 

Some flavors I'm going to try this year are tea-infused oatmeal (make tea then use that water to make oatmeal), ginger-pear, and possibly coffee.   

Wanna Chat?

I turned off the 'leave a comment' feature, so if you want to share what you're thinking about this or anything else, drop me an email at jhk1013 (at) gmail.com. It's so much more cozy than a comment, plus we can have a real conversation!

Thursday, January 17, 2013

My First Pressure Cooker Meal - Chicken Cacciatore

On Monday I made my first official pressure cooker meal for the family, chicken cacciatore.


Overview of a Pressure Cooker

A pressure cooker is a locked cooking vessel that is designed to cook food at 15psi, as opposed to the 0psi you cook with normally (assuming you pretty much live at sea-level).  By increasing the pressure, it cooks food quicker by forcing the steam into the fibers of the food and breaking them down.  In the end, it cooks in 2/3 less time.  So if you make a dish that normally bakes for 1 hour, in the pressure cooker it will cook in 20 minutes. 

For Christmas I got a Fagor Duo 8-quart pressure cooker.  It was an America's Test Kitchen product recommendation, so I trusted them.  I went with the 8-quart size, which is on the larger end.  You can only fill a pressure cooker to a certain line since you need to leave room for the pressure to build, so bigger is better.
Before cooking: Sauteed veggies in the bottom, dried pasta, raw chicken pieces,
jar of spaghetti sauce and a couple dabs of tomato paste. 


What to make?

Along with the pressure cooker I received two cookbooks, plus I've also got a lot of pressure cooker books from the library, so I've been researching all sorts of dishes.  You can also convert slow cooker recipes to work in the pressure cooker since they're pretty similar cooking methods (moist). 

But it was intimidating, I wasn't sure sure what to make in the pressure cooker. There are all sorts of great-sounding recipes with common ingredients, but it's a lot of things that I don't normally have in the pantry like dried beans. Since I bought chicken that day, I figured his would be a good time to try something in the pressure cooker. Once I narrowed it down to chicken dishes, then I had to find the ones that didn't use dried beans since I forgot to buy some of those.  They had chicken cacciatore, so I went with that.  It seems like a more advanced dish because you put the dry pasta in with everything and it cooks with the chicken.  It seems daring to start there, but I was up for trying it.  I didn't even have a backup plan and no time since I had the Ancient Grains class after dinner.


The Recipe

You saute onion and peppers (I used frozen pepper stir fry) and I added some frozen zucchini slices to add a little more veggies.  Then you add dry pasta, some liquid for the pasta (I used veggie stock since I had some extra in the freezer), diced raw chicken, a jar of spaghetti sauce, and a couple tablespoons of tomato paste. You don't stir after adding the tomato products since tomatoes can easily burn in a pressure cooker. 

It's kind of blurry, but this was right after I
opened the lid when it was done cooking.
Then put the lid on and lock it down.  I have a new style pressure cooker, it doesn't have the weight on the top but instead regulates the pressure using valves and rods.  It would have probably been a quicker process, but I forgot to lock the lid until a couple minutes later.  But it didn't cause any major issues since I remembered to check it soon after I started and it reached high pressure quickly since most of the ingredients were already hot. It indicates being at the right pressure by popping up a little valve, so then you turn the heat down to maintain that pressure.

It cooked at high pressure for 5 minutes, then I flipped a switch and it let out all the steam.  I hadn't tried that before so I was a little uncertain what would happen.  It shoots out a jet of steam, so make sure it's pointing away from you.  There are two other methods for reducing the pressure -- natural, where you take it off the heat and let it fall by itself and the food finishes cooking in the residual heat.  The second method is quick-release, you take it off the stove and run cold water down the side to cool it.

Hot and steamy!  Stirred up and added a can of black olives.
Then I added a can of black olives and stirred it.  The pasta kind of stuck to the bottom a bit but most of it scraped up easily.  I think it wouldn't have stuck as much if I had remembered to lock the lid down right away. 


Verdict

Think about this, I put raw chicken and dry pasta in this thing and cooked it for only 5 minutes at high pressure, and everything was done when I opened the lid. So cool!  I was really impressed that it worked as expected.  Not that I had doubts, but I had never tried it before. 

Wanna Chat?

I turned off the 'leave a comment' feature, so if you want to share what you're thinking about this or anything else, drop me an email at jhk1013 (at) gmail.com. It's so much more cozy than a comment, plus we can have a real conversation!

Wednesday, January 16, 2013

"Ancient Grains" Class

On Monday night I went to an Ancient Grains class at HyVee grocery store taught by the store dietician and store chef.  They had tips and information about oats, barley, spelt, quinoa, millet, and amaranth.  It was an hour long and a good introduction for people who would like to explore these different foods.  We tried a southwest quinoa soup, a quick quinoa side dish (tomatoes and feta cheese), a cold farro salad, and an amaranth rice pudding.   The quinoa soup was interesting, I always think of using quinoa more like a solid item such as a side dish, but it worked really well in soup. 

Since quinoa is the most popular grain they talked about and most of the class had tried it, they should have us taste some of the more unknown grains like teff and sorghum. I think it was good overall, though.  I need to remember for the future that I don't need to really eat a meal before I go to classes like this, there was a lot of food to sample. 

Wanna Chat?

I turned off the 'leave a comment' feature, so if you want to share what you're thinking about this or anything else, drop me an email at jhk1013 (at) gmail.com. It's so much more cozy than a comment, plus we can have a real conversation!

Tuesday, January 15, 2013

Crispy, Non-Fried Potato Chips

Potatoes waiting to be sliced.
On Monday I made homemade potato chips.  How cool!  I used the recipe in the book The Homemade Pantry by Alana Chernila

The recipe calls for 1.5 pounds of potatoes (four medium Russet potatoes for me), which I weighed out on my kitchen scale.  If you don't have a kitchen scale, you've got to get one!  Mine is digital and you can easily switch between pounds/ounces and grams and it also has a 'tare' function to reset the scale back to zero as you add more items.  And the weight limit is awesome, I think it goes up to 15 pounds or something.  A high weight limit is good when you're using heavy crockery bowls.  And that's another thing, my previous scale could only be used by weighing in its little cup, which was difficult to use when weighing something long like spaghetti noodles.  So having a scale with a pedestal where you can weigh with any

A nice thin slice.
You start out by cleaning your potatoes and slicing them thin. I used setting #2 on my mandoline. I don't think I would have tackled this if I didn't have a mandoline, I wouldn't have the patience or skill to slice them thin enough with a regular knife.  I have a cheap Progressive adjust-a-slice mandoline and it's great.  I did research when I was originally looking for a mandoline and this one was a decent choice. It's nice and wide, I don't understand why some slicers are so narrow.  The only thing I don't like about it is the food gripper because it doesn't firmly hold anything I've tried with it and the food slides around, which is actually more unsafe.  So I live life dangerously and just hold the food I'm slicing in my bare hand and stop before I get near the end.  Yeah, there's some waste since I can't use the whole food item, but it's better than losing a fingertip. 
Soaking the slices in salted water for 5 minutes.

The thin slices of potato are soaked in salted water, I think this is to draw out the starch. 

After the soaking, you drain and dry off the potato slices using a towel.  You have to make sure you dry them well since any remaining moisture is going to steam your potatoes and they'll take a long time to crisp up.

Potato slices waiting to go in the oven. 
Mural of Flavor salt-free herb blend
Once dried, then you drizzle the potato slices with olive oil, salt them a bit, and layer them on oiled cookie sheets.  At this point I decided to try vary the flavor on half of the chips, so I added Penzey's Spices Mural of Flavor herbal blend. 

Making chips is quick on the front end, not a whole lot of prep, but it is 45 minutes the oven, so it's perfect for the colder months.  It would be way too hot to bake that long in the summer though! 


The finished chips. 
Bake 400 degrees for 15 minutes, then rotate the cookie sheets and turn the oven down to 300 degrees.  Bake for 15 minutes and rotate again.  Bake for yet another 15 minutes and be sure to watch them and make sure they don't get too dark.  Some of mine are a little too dark, but luckily Jeff and I liked them a little darker.  I thought I might need to flip the chips so they would get crispy but the instructions didn't call for it so I didn't and they were fine.  I thought they also might bake onto the cookie sheet, but I used a spatula and they came off fine. 

Verdict:
We loved these!  This was an awesome treat and a much healthier version of potato chips.  We don't normally have potato chips at home mainly because they are unhealthy and we would rather have tortilla chips instead, but it was so awesome to know they weren't fried and I knew exactly what was in them. 


Wanna Chat?

I turned off the 'leave a comment' feature, so if you want to share what you're thinking about this or anything else, drop me an email at jhk1013 (at) gmail.com. It's so much more cozy than a comment, plus we can have a real conversation!

Chocolate Oat Bananakies (banana cookies)

Raw dough waiting to go in the oven.
The first time I made this banana-oat cookie (bananakies) recipe, I tried to make it as close to the original as possible, which is rare for me, I can never seem to leave well-enough alone.  I did add an egg though since I had previously had a run-in with an eggless cookie that didn't stay together.  The cookies were good, but I added some frosting on top because I had some leftover in the freezer and the cookies really needed it.

This time I modified the recipe to make a chocolate version by adding 3 tablespoons of cocoa powder.  I was a little uncertain about not adding sugar to the recipe, but I figured I would try it pretty much as written and add a quick cream cheese frosting if they really needed it.

So when they came out of the oven I had to taste one right away to figure out if they needed frosting. And a few minutes later I had to have a couple more, just to be sure.  No frosting was needed, they are quite tasty on their own.  Even Husband Jeff likes them a lot. 


Finished cookies cooling on the rack.


Wanna Chat?

I turned off the 'leave a comment' feature, so if you want to share what you're thinking about this or anything else, drop me an email at jhk1013 (at) gmail.com. It's so much more cozy than a comment, plus we can have a real conversation!

Friday, January 11, 2013

Creole Shrimp and Sausage Stew

The container of leftover stew.
Last night I made Creole Shrimp and Sausage Stew, it was quick and really tasty.  I can never seem to follow a recipe exactly, but use them as a guideline for what type of ingredients should be added.  Plus I always feel like I know a lot about cooking and how I want a dish to turn out.  So I generally followed the recipe, but made some slight variations -- I used pepper & onion stir fry, Cajun chicken sausage, vegetable broth (what I had leftover in the freezer), and I a can of diced tomatoes plus 1/2 can of diced green chiles.

The reviews indicated it was a little bland, which makes sense since there's barely any spices in it. I wanted to add some Cajun seasoning, but I forgot that when I organized the pantry to alphabetize my spices in my new spice rack (hand made Christmas gift from Husband Jeff) that I discovered the jar of the Cajun spice blend was cracked and I threw the whole thing away.  So I followed this Simple Cajun Seasoning recipe to approximate the flavor I was looking for. 

We had some leftover rice in the freezer from a recent Chinese takeout meal, so I reheated that in the microwave and we put the stew on top of the rice.  Dinner was ready in less than 20 minutes.  Well, I didn't time it, but close enough.  The point is, it was quick.  And Jeff and I thought it was great, a definite repeat.  

Wanna Chat?

I turned off the 'leave a comment' feature, so if you want to share what you're thinking about this or anything else, drop me an email at jhk1013 (at) gmail.com. It's so much more cozy than a comment, plus we can have a real conversation!

Grapefruit Oatmeal

This morning I tried grapefruit in my oatmeal, based on this grapefruit oatmeal recipe.  A few days ago I made a big batch of oatmeal so I figured today would be a good day to try this experiment because if it wasn't very good tasting, I had more oatmeal waiting in the fridge that I could heat up.

I used half of a pink grapefruit and cut the sections as if I was going to eat it with a spoon.  I scooped it into my oatmeal bowl and aimed to get only the fruit out and not a lot of juice since I prefer my oatmeal on the thicker side.  I stirred it in and the fruit broke up into the little juicy pockets that make up citrus fruit.  I warmed it for 2 minutes, and added cinnamon and my standard "milk" float (non-dairy creamer + almond milk) on top.

I would have taken a photo, but it pretty much looked like my regular oatmeal except there were some barely-discernible pink-ish bits in it.  The taste was fine, but I really couldn't taste the grapefruit, which is weird because it's usually quite tart and strong.  It might be that since I squeezed the rest of the juice into a bowl and added a drizzle of honey and ate that first that my mouth was already used to the tartness.  So not like I wouldn't recommend it, but I don't really see a reason to do it.  I'll probably use the other half of the grapefruit in another bowl of oatmeal, though.  It's nice to know you're getting some good vitamin C in your bowl.

So this was another successful bowl of oatmeal.  I think my only oatmeal experiment that I didn't like and threw away was the egg version.  You crack an egg into your oatmeal and cook it in, and it turns thick and custard-y, it was way too eggy for me. 

Wanna Chat?

I turned off the 'leave a comment' feature, so if you want to share what you're thinking about this or anything else, drop me an email at jhk1013 (at) gmail.com. It's so much more cozy than a comment, plus we can have a real conversation!
Wednesday, January 9, 2013

Take Me There: Bulk Aisle Tour

On Tuesday night I took a bulk aisle tour class at the Willy Street Co-op.  It's free for members.  I highly everyone who shops there to take it, it was informative and interesting.  I was surprised to learn that they have tea in bulk, in particular the Rishi tangerine-ginger tea I have been looking for.  Of course I bought some of that.  And I had to buy some more instant curry lentil soup from the bulk bins as well.  It's so tasty and handy to keep at your desk, all you need to do is add hot water and let it hydrate for a few minutes.  Some other things I loved about the tour is that I found out how to bring in your own containers (I feel so wasteful using bags) and that some things are certainly a better deal when you buy them from the bulk bins, but they're also honest about when it's cheaper to buy a non-bulk product.  And they now have a little pamphlet in the bulk area that tells you the details on how to cook everything in the bulk area, so you won't get home and wonder what to do with that amaranth or brown basmati rice.  

Wanna Chat?

I turned off the 'leave a comment' feature, so if you want to share what you're thinking about this or anything else, drop me an email at jhk1013 (at) gmail.com. It's so much more cozy than a comment, plus we can have a real conversation!

Comfort Food: Biscuits and Gravy

Fluffy biscuits
Made biscuits and sausage gravy tonight for dinner, along with scrambled eggs and fruit.  The biscuit recipe originally started from this rosemary garlic Parmesan biscuit recipe, but I made them with an herb blend instead of rosemary and no cheese.  I probably mixed them more than they should, but they were still light and tender.  They're made with Heart Smart Bisquick, which is awesome stuff.  Husband Jeff says it makes great pancakes. 

sausage gravy - not exactly photogenic, but tasty!
I used this gravy recipe for this minus the pork chops and mashed potatoes.  Husband Jeff thought it had almost too much black pepper, but I figured it would be boring because there wasn't any sausage grease to add flavor since I was using turkey breakfast sausage.  Gravy like this should be made with equal parts butter and flour, so I used that ratio and added garlic powder and onion powder.  Our toddler son wouldn't eat any of it, which is kind of surprising, but he has a cold right now and was fussy for the rest of the evening. 


Wanna Chat?

I turned off the 'leave a comment' feature, so if you want to share what you're thinking about this or anything else, drop me an email at jhk1013 (at) gmail.com. It's so much more cozy than a comment, plus we can have a real conversation!

Tuesday, January 8, 2013

Crank It: Homemade Pasta

Made homemade pasta last night, it was awesome!  I've made homemade pasta before, but this was my first time using my awesome thrift store find, an Imperia pasta roller machine.  Normally they're about $70, but mine was $5 at a Milwaukee-area St. Vincent de Paul.  What a score!


The dough starting to come together.
For the pasta dough I followed the Michael Ruhman ratio of weighing your pasta dough ingredients.   I also skipped the method of putting a pile of flour on your countertop to mix the dough, I did it in a bowl.  Put my bowl on the scale, tared out the weight, added two eggs to the bowl (two eggs = 4 oz), and multiplied that by 1.5 to get the amount of flour (6 oz).  Added flour and mixed it up until the dough came together, then kneaded it on the countertop for five minutes.  Five minutes is a long time when you're kneading, but luckily it's a small ball and not too tough.  Wrap it in plastic wrap and let it sit for at least 30 minutes to let the flour get hydrated.

Using the roller machine, making thin sheets of dough.
 I made a practice ball of dough (just flour and water) so I could play with the machine and clean it out since it can't be washed.  I found that it helps to let the dough dry out a little between rolling and using the cutting side.  And it's also nice to have a second set of hands, one cranks the handle while the other person feeds the dough into and out of the rollers.  It was stressful with a toddler trying to help, but we eventually got it made and into the boiling water.  I had some homemade pesto sauce cubes in the freezer, so we used that as sauce


Next time I want to try making lasagna with homemade pasta sheets.  I think it would be delicious, plus easier.  Running the dough through the cutter rollers was the hardest part, so skipping that step sounds good to me. 

Wanna Chat?

I turned off the 'leave a comment' feature, so if you want to share what you're thinking about this or anything else, drop me an email at jhk1013 (at) gmail.com. It's so much more cozy than a comment, plus we can have a real conversation!

Saturday, January 5, 2013

Leftover Tomato Sauce Equals Quick Minestrone Soup

My bowl of soup.

Made a quick minestrone soup last night, Jeff and I loved it.  We had part of a jar of spaghetti sauce left over from the shakshuka earlier in the week and no idea what to do with it, minute minestrone to the rescue.   I used some leftover Italian-sausage flavored ground turkey, carrot shreds, a can of garbanzos, a can of diced tomatoes, a handful of diced spinach, and that half a jar of spaghetti sauce.   I made pasta separately and let each person decide their own amounts.   Serve with grated Parmesan on top.  It made enough for dinner and leftovers for lunch the next day. 

Wanna Chat?

I turned off the 'leave a comment' feature, so if you want to share what you're thinking about this or anything else, drop me an email at jhk1013 (at) gmail.com. It's so much more cozy than a comment, plus we can have a real conversation!

Friday, January 4, 2013

Upside-Down Taco Salads

A typical taco salad you get at a restaurant has a giant deep-fried tortilla bowl with the ingredients inside.  I have to admit I've never had one of those, but I've seen them.  That fried shell is more fat than you need, so we make our own version at home but I call them upside-down taco saladsWe use a bed of salad greens with your favorite taco fixings (tomatoes, salsa, green olives, avocado, beans, crumbled veggie burger, leftover taco meat, cheese, etc.) and topped with crushed tortilla chips and salsa/taco sauce.  If you don't use any other dressing other than salsa or taco sauce (fat-free!), I feel you can use a good handful or two of crushed tortilla chips on top.  :) 

Wanna Chat?

I turned off the 'leave a comment' feature, so if you want to share what you're thinking about this or anything else, drop me an email at jhk1013 (at) gmail.com. It's so much more cozy than a comment, plus we can have a real conversation!

Thursday, January 3, 2013

A Fast Bite: Tortilla-Egg Rollup

Spray a a non-stick skillet with a little cooking spray, add a corn tortilla and and break an egg on top of the tortilla.  You can break the yolk if you want, I like my egg flatter.  Add a lid and cook over medium heat about 6-7 minutes until the egg is almost done the way you want.  Add a little bit of cheese and put the lid back on until it's melted.   Then use a spatula to pull the whole thing out of the skillet, add some smashed avocado and some salsa/taco sauce and a sprinkle of salt. Fold in half like a taco, the tortilla will be crispy but won’t break.  Totally delicious!   

Wanna Chat?

I turned off the 'leave a comment' feature, so if you want to share what you're thinking about this or anything else, drop me an email at jhk1013 (at) gmail.com. It's so much more cozy than a comment, plus we can have a real conversation!

Wednesday, January 2, 2013

Eggs in Tomato Sauce (shakshuka)


I had never heard of it, but shakshuka is a middle eastern dish where you poach eggs in tomato sauce.  I made a quick version – sautéed some pepper stir fry for about 5 min, added garlic and cooked a bit more, then added about half a jar of spaghetti sauce.  Made divots in the sauce and slid eggs into them.  I used my medium skillet and got 6 eggs in. I would have preferred the eggs a tiny bit runny, but husband Jeff likes them solid so I added his before mine and cooked the whole thing a little longerIt took longer than I expected for the eggs to be cooked, maybe almost 15 minutes. Sprinkled a little feta on top towards the end because that’s what I had leftover.  We served it on toast, but next time I would like to serve it on polenta because the toast was a little too firm.  And I thought it could use more sauce, so maybe I would use the whole jar or maybe add some plain canned tomato sauce.

Can I just go on a little bit about pepper stir fry?  It's my current favorite food find.  It's so nice to have on hand to throw in recipes.  It seems I'm always looking at recipes that start with peppers and onions, and usually there's an onion in my hanging fruit/veggie basket, but I never seem to buy peppers.  Plus the non-green bell peppers are always way more expensive, and my el cheapo side tends to win out and I don't get the more-tasty other colors.  But in the pepper stir fry there's a variety of colors of peppers -- yellow, orange, red, etc.The peppers and onions come in decent-sized chunks but it's easy to dice it a little smaller.

Wanna Chat?

I turned off the 'leave a comment' feature, so if you want to share what you're thinking about this or anything else, drop me an email at jhk1013 (at) gmail.com. It's so much more cozy than a comment, plus we can have a real conversation!