- Monday - salads, carrots from the farmers' market, slow cooker cheese ravioli
- Tuesday - Husband Jeff and I start the plank challenge, salads, green beans from the farmers' market, and the BBQ tempeh sandwiches that I planned for last week but we didn't actually have.
- Wednesday - eye of round steaks, Brussels sprouts from the farmers' market, salads
- Thursday - hard boiled eggs and sweet potato pancakes
- Friday - ?
- Saturday - Husband Jeff and I are attending Ron & Rachel's wedding in the evening so we're covered with dinner there. My friend Renae will be in town at some point in the weekend, hopefully I'll get to see her!
- Sunday - Sonny D and I will hit the north side farmers' market as per usual. In the afternoon my best friend's kids are coming to visit while she's in town. I also wouldn't mind catching a little of the Packer game.

A blog about healthy and lower-calorie cooking, recipes, and food. Inspired by all of the other healthy resources I read including other blogs, cookbooks, magazines, and websites.
Monday, September 30, 2013
Menu Plan: Week of September 30
This week starts the 30-day plank challenge and Husband Jeff is doing it with me. I signed up for the website's updates so I was able to print off a tracker sheet to keep tabs on our progress. I highly suggest you try it, too!
Wanna Chat?
I turned off the 'leave a comment' feature, so if you want to share what you're thinking about this or anything else, drop me an email at jhk1013 (at) gmail.com. It's so much more cozy than a comment, plus we can have a real conversation!
Thursday, September 26, 2013
Another Fitness Challenge: Holding a Plank
I enjoyed the virtual climb up Mount Corcovado that I did in August and September (finished just after Labor Day) so when I found this 30-day plank challenge, I decided I would try it. I can already hold a variety of plank positions and I do them regularly in my Saturday morning Core Fusion class, but it would be fun to challenge myself to advance to longer holds and more difficult versions.
I like that this starts on October 1 and is only a month long. I like the specific amount of time for the challenge. I am worried that I'll forget to do it, so once again, I'll set my phone to remind me each day.
Try it with me! Check the plank challenge page to see the examples, it starts with the easiest and tells you how to make it harder if you need it. Push yourself to see what you can do! Holding the plank position is great for your abdominal muscles, so you'll get a good mini workout.
Wanna Chat?
I turned off the 'leave a comment' feature, so if you want to share what you're thinking about this or anything else, drop me an email at jhk1013 (at) gmail.com. It's so much more cozy than a comment, plus we can have a real conversation!
Silky Baba Ghanoush
We grew eggplant in our garden this year and I have found I love it! The eggplant Parmesan was great, I made it two times in one week. So I wanted another dish that involved eggplant, and you can't get any more "pure eggplant" than baba ghanoush since it's eggplant puree, similar to hummus.
This recipe normally calls for tahini (sesame paste), since I had to recently throw my super-expired jar out, I figured I would replace it in the same way I did when I made homemade hummus, by adding sesame seeds and sesame oil, but in this recipe it didn't work so great.
The recipe calls for throwing the whole eggplant in the oven, but I was afraid it might blow up even after poking it with a fork, so I cut them into quarters lengthwise and put them on a baking sheet. I thought they might need a little help to brown, so I added a spritz of coconut oil.
Roast the eggplant for 20-25 minutes or until it's soft and gushy. Scoop the flesh out of the skin and put the eggplant innards into a food processor with the rest of the ingredients. Process until smooth.
I liked it, but the sesame oil was too much, it was quite "Asian" in flavor. I've already browned my eggplant for my next batch and I will definitely leave out the sesame oil. I eat the dip with slices of red bell pepper, it's a fresh and healthy snack and surprisingly quite filling.
Inspiration
Slender Kitchen baba ganoush (eggplant dip)This recipe normally calls for tahini (sesame paste), since I had to recently throw my super-expired jar out, I figured I would replace it in the same way I did when I made homemade hummus, by adding sesame seeds and sesame oil, but in this recipe it didn't work so great.
Ingredients
- 1 eggplant
- 1Tb sesame seeds
1Tb sesame oil(I wouldn't use this, made it too "Asian")- 2Tb lemon juice
- 2 cloves garlic, minced
- 1 Tb EVO
- 1/2 tsp salt
- Fresh black pepper
Directions
Preheat the oven to 450 degrees. |
| spritzed eggplant in the oven. |
 |
| Browned eggplant. |
 |
| Eggplant puree. |
Verdict
Creamy and good, but too Asian.I liked it, but the sesame oil was too much, it was quite "Asian" in flavor. I've already browned my eggplant for my next batch and I will definitely leave out the sesame oil. I eat the dip with slices of red bell pepper, it's a fresh and healthy snack and surprisingly quite filling.
Wanna Chat?
I turned off the 'leave a comment' feature, so if you want to share what you're thinking about this or anything else, drop me an email at jhk1013 (at) gmail.com. It's so much more cozy than a comment, plus we can have a real conversation!
Wednesday, September 25, 2013
Korean Ribs in the Slow Cooker
I threw this recipe together with the intention of cooking the ribs all day in the slow cooker and then finishing them off on the grill. I couldn't find the recipe I've used previously, so we skipped the grill step and just ate them straight from the slow cooker.
I cut this recipe down to one third the original amount since I was marinating my ribs in a bag, which allows you to remove the air and the marinade touches more of the meat. I also reduced the amount of sugar since I don't like sweet combined with meat, this was sweet enough for us. I wasn't sure if the red pepper in the recipe was the standard-pizza-topper crushed red pepper or Korean gochujaru. I went with the Korean version since this is a Korean recipe, plus it's not too spicy.
I also skipped the green onion since I didn't have any, but otherwise I had everything else on hand to make this marinade.
In the morning, I dumped everything from the bag into the slow cooker and cooked it on low all day. I served it with cauliflower mash.
The cauliflower mash was a neat match-up with the ribs since they weren't American-flavored ribs, but rather Korean. I think maybe next time I would try the cauliflower mash with some parsnips and horseradish for a way to cut the sweet and richness of the meat.
Inspiration
Savory Sweet Life authentic kalbiI cut this recipe down to one third the original amount since I was marinating my ribs in a bag, which allows you to remove the air and the marinade touches more of the meat. I also reduced the amount of sugar since I don't like sweet combined with meat, this was sweet enough for us. I wasn't sure if the red pepper in the recipe was the standard-pizza-topper crushed red pepper or Korean gochujaru. I went with the Korean version since this is a Korean recipe, plus it's not too spicy.
I also skipped the green onion since I didn't have any, but otherwise I had everything else on hand to make this marinade.
 |
| Ingredients lineup |
Ingredients
- 1/2 c soy sauce
- 2T brown sugar
- 2T sesame oil
- 2 cloves garlic
- 1/4 onion, slices
- 1T sesame seeds
- 1/2 tsp gochujaru (Korean red pepper flakes) or 1/4 tsp red pepper flakes
- 4.45 lbs pork spare ribs
Directions
Put the marinade ingredients in a gallon freezer bag and the meat. It's that easy! I let mine marinade overnight in the refrigerator. |
| My ribs with cauliflower mash |
In the morning, I dumped everything from the bag into the slow cooker and cooked it on low all day. I served it with cauliflower mash.
Verdict
The ribs were great, a little sweet and super flavorful. I wish I could have found the recipe I've used previously where you finish the ribs on the grill, but this was great. I loved the end pieces that stuck out of the cooking liquid, they were brown and dried out a little and perfectly chewy. All three of us really liked this. I can see the appeal of ribs, they were so tasty, but I don't like all the fat. I would definitely use this marinade on pork in the future, maybe a pork tenderloin on the grill.The cauliflower mash was a neat match-up with the ribs since they weren't American-flavored ribs, but rather Korean. I think maybe next time I would try the cauliflower mash with some parsnips and horseradish for a way to cut the sweet and richness of the meat.
Wanna Chat?
I turned off the 'leave a comment' feature, so if you want to share what you're thinking about this or anything else, drop me an email at jhk1013 (at) gmail.com. It's so much more cozy than a comment, plus we can have a real conversation!
Monday, September 23, 2013
Menu Plan: Week of September 23
This should be a relatively quiet week except Husband Jeff is going to be away for dinner for a couple evenings so I get to wrangle Sonny D all by myself (god bless the single parents, I don't know how they do it!). We're also trying to plan a date night since we haven't had one in a while.
- Monday - I bought a fresh lemon to make creamy crockpot lemon chicken and I figured I had better hurry up and use it while it's still good. I'll serve it on pasta along with salads.
- Tuesday - Jeff is away for work so I think I'll make pesto fresh from our garden with pasta since it's one of Sonny D's favorites. I'll also make hot dogs (one of my favorites, I like light Kosher dogs) along with sweet potato fries. On Thursday I'm participating in a potluck for a coworker's promotion and I want to make a vegetarian chickpea pesto soup for my dish to share but since I'll be busy on Wednesday, I want to make it tonight.
- Wednesday - Jeff is away again during dinner time and I've got PiYo class so I'm going to make a quick dinner of a frozen broccoli and beef Asian meal for Sonny D and I.
- Thursday - Jeff and I are planning a date night at Dobhan to use a discounted restaurant gift certificate.
- Friday - I'm going out for a moms' night out at Pasqual's and I figure Husband Jeff will opt for his usual meal choice of pizza.
- Saturday - During the day we're going to Applefest with another family. I'd like to try making BBQ tempeh sandwiches for dinner.
- Sunday - We'll go for our usual morning visit to the north side farmers' market and then over lunch/early afternoon our adoption social worker is throwing a big party at a local farm because she's retiring. We'll be taking our own lunch but since I've never done a cooler weather picnic, I'll need to reasearch ideas for what to pack for us. For dinners on the weekend, I always have trouble deciding what to make. Usually by the end of the week I'd prefer to have a really simple meal of something like soup and melt sandwiches, but the weekends are also the time when I get a lot of time to prep dinner and let it cook for a while. This might be another simple day, or it might be something a little more involved. We'll see what happens when Sunday gets here!
Wanna Chat?
I turned off the 'leave a comment' feature, so if you want to share what you're thinking about this or anything else, drop me an email at jhk1013 (at) gmail.com. It's so much more cozy than a comment, plus we can have a real conversation!
Thursday, September 19, 2013
Eat Your Vegiges in a New Way: Cauliflower Mash
When I made Korean ribs for dinner I needed more to go with it. Lately the veggie of choice has been salads, but we were out of greens so I dug in the freezer to see what our other options were. I went with a bag of butternut squash and a bag of cauliflower. I didn't like the microwaved butternut squash, it was just a gloppy mess. But the cauliflower I turned into cauliflower mash.
I've got other recipes bookmarked but I those were all for fresh cauliflower and all I had was a bag of frozen. So that's how I ended up with this recipe.
I switched out the coconut oil for butter and used regular milk.
After cooking, I drained the bit of water off, added some garlic, herb blend, butter, fresh black pepper and a splash of almond milk.
Then I whipped it up with the blender attachment for my immersion blender. Added a sprinkle of salt and tasted it, a dash more salt. Serve!
Sonny D helped me make this. I thought it was going to be a huge mess splattered all over our kitchen using the immersion blender in the baking dish because usually I need to use a container with tall sides, but it was actually fine.
I've got other recipes bookmarked but I those were all for fresh cauliflower and all I had was a bag of frozen. So that's how I ended up with this recipe.
Inspiration
The Clothes Make the Girl mashed cauliflowerI switched out the coconut oil for butter and used regular milk.
Directions
Cook the cauliflower in the microwave as directed on the package. I added a splash of water and actually used the auto-cook feature on my microwave that is specific for frozen veggies. |
| Frozen cauliflower in the casserole dish. |
 |
| Cooked cauliflower with garlic, salt, pepper, herb blend, and butter. |
Then I whipped it up with the blender attachment for my immersion blender. Added a sprinkle of salt and tasted it, a dash more salt. Serve!
Sonny D helped me make this. I thought it was going to be a huge mess splattered all over our kitchen using the immersion blender in the baking dish because usually I need to use a container with tall sides, but it was actually fine.
 |
| Looks like mashed potatoes. |
 |
| Ribs and cauliflower mash. |
Verdict
Sonny D loved this so much he had two servings. I liked it a lot too. Husband Jeff ate it, but didn't love it even though he normally likes cauliflower.
You can't really try to pass it off as mashed potatoes, to me it still obviously tasted like cauliflower, but it's a nice way to eat it. And we ate a lot more than I expected, there was only about 1/3 cup leftover, which was still good reheated.
Wanna Chat?
I turned off the 'leave a comment' feature, so if you want to share what you're thinking about this or anything else, drop me an email at jhk1013 (at) gmail.com. It's so much more cozy than a comment, plus we can have a real conversation!
Wednesday, September 18, 2013
Tangy Ancho-Jalapeño Lime Jelly
 |
| My scribbled recipe that I refined as I worked. |
He picked all the good peppers and brought them inside, we had so many that they overflowed the cake container I put them into. Unfortunately this recipe only used four big ancho peppers and four small jalapeños, but I made another batch later to use up another eight peppers.
This was my first low-sugar pectin recipe. After tasting it, going the low-sugar route is totally my preference since it's not as tooth-achingly sweet as when you use regular pectin, which needs a lot of sugar to gel up.
Inspiration
Ball canning pepper jellyYou Grow Girl zippy mixed pepper and lime jelly
Ingredients
- 4 big, non-spicy peppers, about 2 cups chopped (I used Ancho San Martin since that's what we grew but standard bell peppers would be fine too.)
- 1/4 c chopped onion
- 4 spicy peppers, chopped (I used jalapeños)
- 1 c cider vinegar
- 1/2 cup lime juice (2 limes)
- 1 c sugar
- 1/2 c honey
- 1 1/2 tablespoons low-sugar pectin
Directions
 |
| Jars in boiling water to sterilize. |
 |
| Chopped peppers and onions. |
Chop peppers and onion in food processor. Since I didn't know what our peppers were like, I tasted each one as I cut it up so I knew what I was working with. I was glad I tried them because I added another jalapeño since a couple of the others weren't too spicy.
Add the chopped peppers and onions to a large sauce pan and add cider vinegar and lime juice. Add pectin and bring to a full rolling boil over high heat, stirring constantly. Add sugar and honey and return to fill boil. Boil hard for 3 minutes, stirring constantly. Remove from heat. Skim off any foam if necessary.
 |
| Vintage citrus juicer and limes. |
Add the chopped peppers and onions to a large sauce pan and add cider vinegar and lime juice. Add pectin and bring to a full rolling boil over high heat, stirring constantly. Add sugar and honey and return to fill boil. Boil hard for 3 minutes, stirring constantly. Remove from heat. Skim off any foam if necessary.
 |
| Peppers, onions, cider vinegar, lime juice. |
Put jelly in jars, leaving 1/4 inch headspace. Wipe rim and add lids. Screw on bands to finger tight.
 |
| Tangy jelly mixture, ready to go in the jars. |
Process jars for 10 minutes in the boiling water. After the 10 minutes are up, turn off heat and let the jars sit in water for 5 minutes. Remove from the water and place on two kitchen towels on the countertop.
Verdict
So cool! I've been so excited to make jelly and then can it. Unfortunately this jelly wasn't spicy, but I like the tangy flavor. It's not extremely green pepper flavored, which is nice because that can be too assertive of a flavor. It's good on buttered toast. I tried it on a roast beef sandwich but it was a little too sweet. But it's certainly not as sweet as my wine jelly recipe, which is good. I'm going to continue with making jellies with low-sugar pectin since there's no reason to use all that sugar.Wanna Chat?
I turned off the 'leave a comment' feature, so if you want to share what you're thinking about this or anything else, drop me an email at jhk1013 (at) gmail.com. It's so much more cozy than a comment, plus we can have a real conversation!
Tuesday, September 17, 2013
Roll It Up In Bread Dough: Pizza Pockets
This is a non-recipe for pizza pockets that I'm going to display in pictures. I'll give you some vague amounts and you can make it be whatever you want.
Then I emptied a jar of pizza sauce into a bowl and added our favorite pizza toppings -- chopped pepperoni, a pizza brat, peppers & onion mix, shredded cheese, chopped sauteed spinach, shredded zucchini, etc. I even added some chopped cauliflower mixture that I had leftover from the cauliflower crust mini pizzas. I wanted to add chopped mushrooms, but Sonny D and Husband Jeff are not fans.
I rolled each piece of dough out and spooned on some filling, then folded the edge over and rolled and pinched it shut. I placed them onto a sprayed cookie sheet and baked them until they were golden brown. I think it was about 20-30 minutes in the oven at 350 degrees.
I wish I had cooked them a little longer, but I was impatient for dinner. The dough was done, but I would have liked it a little browner.
It would be fun to make these into a breakfast version with scrambled egg, sausage, veggies, etc. You could also make these smaller with other ingredients like ham and cheese and broccoli to make your own "hot pockets".
Ingredients and Directions
I defrosted a loaf of frozen bread dough overnight in the refrigerator and cut it into four pieces.Then I emptied a jar of pizza sauce into a bowl and added our favorite pizza toppings -- chopped pepperoni, a pizza brat, peppers & onion mix, shredded cheese, chopped sauteed spinach, shredded zucchini, etc. I even added some chopped cauliflower mixture that I had leftover from the cauliflower crust mini pizzas. I wanted to add chopped mushrooms, but Sonny D and Husband Jeff are not fans.
I rolled each piece of dough out and spooned on some filling, then folded the edge over and rolled and pinched it shut. I placed them onto a sprayed cookie sheet and baked them until they were golden brown. I think it was about 20-30 minutes in the oven at 350 degrees.
 |
| Chopped turkey pepperoni with an artistic shot of the pizza sauce can. |
 |
| Cooking up a pizza brat from the local meat market. |
 |
| Chopped peppers & onions from a bag. |
 |
| Shredded cheese. I think it's a co-jack blend. |
 |
| Cutting up the brat into bits. |
 |
| Spinach in the sauce. |
 |
| A not-quite-circular "round" of dough with a quarter of the filling. |
 |
| Pockets in the oven. |
 |
| Half of a pocket with half an ear of corn. |
 |
| Cross-section. |
Verdict
The dough of the pizza pockets was a little softer than I expected, but the filling was so good! Husband Jeff and I shoveled ours down our gullets, but Sonny D didn't touch his. He had every right to be suspicious, I was attempting to sneak in all sorts of veggies on him. He had no idea what he was missing out on though. Later I reheated a leftover end for Sonny D to have for lunch and he ate all of it, so it still ended up that he ate it and enjoyed it.I wish I had cooked them a little longer, but I was impatient for dinner. The dough was done, but I would have liked it a little browner.
It would be fun to make these into a breakfast version with scrambled egg, sausage, veggies, etc. You could also make these smaller with other ingredients like ham and cheese and broccoli to make your own "hot pockets".
Wanna Chat?
I turned off the 'leave a comment' feature, so if you want to share what you're thinking about this or anything else, drop me an email at jhk1013 (at) gmail.com. It's so much more cozy than a comment, plus we can have a real conversation!
Monday, September 16, 2013
Meal Plan: Week of September 16
This is a quiet week for Sonny D and Husband Jeff. I've got a few things going on, but most of it is pretty standard stuff.
- Monday - soup (home frozen or store-bought), sandwiches, green beans from the farmers' market, salads
- Tuesday - I want to go to the drop-in Zumba class so I thought we'd have grilled eye of round steaks or hot dogs along with pesto pasta (with some zucchini thrown in) and salads
- Wednesday - I've got PiYo (Pilates-Yoga class) and wanted to experiment with breakfast enchiladas (enchiladas made with black beans and scrambled eggs).
- Thursday - I'm having a night out with the girls, we're going out for dinner at Lao Laan-Xang and then a chocolate tasting at Gail Ambrosius Chocolatier afterwards.
- Friday - We've been trying to plan dinner out with our friends Dustin & Jessica, but I don't know if it will happen.
- Saturday - I've got Core Fusion exercise class in the morning. Also in the morning at Warner Park is the Big Rig Gig, a children's event of large vehicles like skid steers, excavators, fire trucks, etc. Should be a lot of fun for Sonny D. I didn't plan a meal, but I'm sure we can figure something out. I've got all afternoon to make something if it's going to take more time or if we don't end up going out on Friday night, maybe we'll go out for dinner tonight.
- Sunday - Once again, our regular north side farmers' market visit in the morning for loads of fresh local produce and eggrolls for Sonny D. This weekend is the Willy Street Fair, depending on the weather and all that, we'll go either Saturday or Sunday. Maybe we'll get dinner there.
Wanna Chat?
I turned off the 'leave a comment' feature, so if you want to share what you're thinking about this or anything else, drop me an email at jhk1013 (at) gmail.com. It's so much more cozy than a comment, plus we can have a real conversation!
Tuesday, September 10, 2013
Garden Bounty: Eggplant Parmesan
Taking advantage of the eggplant in our garden, I decided to make eggplant parmesan. I've never really had eggplant parmesan before, so I didn't realize that it was a little different than I expected, it seems like it's officially supposed to be layered with cheese in the middle, but I skipped that step since I wanted to cut calories and I don't do that when I make tofu parmigiana.
I only used a small eggplant since that looked like the right amount we would eat for dinner. I didn't know if it would reheat well, but it probably would have been fine warmed up in the toaster oven.
I only followed the baking part of this recipe and served it with whole-grain spaghetti and jarred sauce.
Working with each individual slice of eggplant. Dredge each slice of eggplant in the flour mixture, then egg, and then the breadcrumb and cheese mixture.
Place on the cookie sheet and bake for 15 minutes. Flip over the pieces and bake for another 15 minutes.
I really liked this, why don't people eat eggplant dishes more often? I liked the creaminess and that it didn't have much of a flavor so it was mainly a vehicle for the tomato sauce. The crispy panko and parmesan was really good, too. I felt it needed more salt, so I lightly salted the pieces on my plate before I added some sauce on top.
Sonny D wouldn't even try his, but lately he hasn't wanted to try anything new. Usually he throws the offending item off his plate (typically it lands on the table, but not always) but I'm working on getting him to leave things on his plate even if he doesn't want them. That seems to be going ok for right now, and we're considering the next move to have him try a bite.
I wish I had prepped and baked the large eggplant I harvested from the garden since I wouldn't mind some of the leftovers for lunch.
I only used a small eggplant since that looked like the right amount we would eat for dinner. I didn't know if it would reheat well, but it probably would have been fine warmed up in the toaster oven.
Inspiration
Cooking Light eggplant parmesanI only followed the baking part of this recipe and served it with whole-grain spaghetti and jarred sauce.
Ingredients
- 1-2 eggplants, sliced
- 1/4 cup flour (seasoned however you like, I added salt & pepper)
- 2 eggs, beaten
- 1/3 cup panko crumbs
- 2 T parmesan cheese
Directions
Preheat your oven to 375 degrees. Spray a cookie sheet with cooking spray.Working with each individual slice of eggplant. Dredge each slice of eggplant in the flour mixture, then egg, and then the breadcrumb and cheese mixture.
 |
| Baked eggplant |
Place on the cookie sheet and bake for 15 minutes. Flip over the pieces and bake for another 15 minutes.
 |
| Eggplant with spaghetti and red sauce. |
Verdict
Soft inside, crunchy breading.I really liked this, why don't people eat eggplant dishes more often? I liked the creaminess and that it didn't have much of a flavor so it was mainly a vehicle for the tomato sauce. The crispy panko and parmesan was really good, too. I felt it needed more salt, so I lightly salted the pieces on my plate before I added some sauce on top.
Sonny D wouldn't even try his, but lately he hasn't wanted to try anything new. Usually he throws the offending item off his plate (typically it lands on the table, but not always) but I'm working on getting him to leave things on his plate even if he doesn't want them. That seems to be going ok for right now, and we're considering the next move to have him try a bite.
I wish I had prepped and baked the large eggplant I harvested from the garden since I wouldn't mind some of the leftovers for lunch.
Wanna Chat?
I turned off the 'leave a comment' feature, so if you want to share what you're thinking about this or anything else, drop me an email at jhk1013 (at) gmail.com. It's so much more cozy than a comment, plus we can have a real conversation!
Monday, September 9, 2013
Meal Plan: Week of September 9
I finished my mountain climber challenge on Tuesday last week because I felt guilty for missing days the previous week. I started on August 1 and completed 2,330 steps by September 3. That's an average of 73 steps per day. I'm pretty impressed that I did it so quickly but was a little disappointed that my attention waned at the end and I started skipping days.
This week starts a new semester of classes through the Madison schools & community recreation. I signed up for PiYo (Pilates and yoga mix) on Wednesdays and my standard Saturday morning Core Fusion (essentially Pilates). I'm also going to try to go a Tuesday Zumba class as well, but I don't know if I'll have enough stamina to have workouts two days in a row.
This week starts a new semester of classes through the Madison schools & community recreation. I signed up for PiYo (Pilates and yoga mix) on Wednesdays and my standard Saturday morning Core Fusion (essentially Pilates). I'm also going to try to go a Tuesday Zumba class as well, but I don't know if I'll have enough stamina to have workouts two days in a row.
- Monday - We'll have leftover pizza pockets from Saturday, beets, sweet corn, and salads. Husband Jeff wants some new glasses, so we're talking about going to check out what's available at JC Penney's since they've got a deal right now where frames are $1 when you buy the lenses. I'll have to take a look too, maybe they've got some cute ones for me.
- Tuesday - I've got Zumba class at 6:30 so we're going with the quick route of grilling sausages and hot dogs and green beans.
- Wednesday - My first PiYo class, I hope I like it. I was feeling really lazy and uninspired when I wrote up the menu plan for the week, so I went with melt sandwiches and salads.
- Thursday - I want to try making Korean ribs. I'll cook a rack of ribs in the slow cooker all day and then we'll finish them off on the grill. We've done this before but this time I'm going to marinate/cook them with Korean flavors. We'll probably have this with rice and a bag of frozen veggies.
- Friday - I'm taking the day off from work so I can volunteer at the Half-Pint kid resale event. For volunteering, I get to shop early at the sale, so I'm going to look for shoes for Sonny D and a couple specific toys, but it's always fun to see what's available and find things you didn't know you needed. Since my shift goes into the dinner time, Husband Jeff is taking Sonny D to a family dinner event without me.
- Saturday - I've got Core Fusion class in the morning and then in the afternoon we're going to our friend Chuck's house for an annual grillout called Septemberfest. I tried to brainstorm some ideas for a dish to share but I'm not completely set yet. My latest idea was roasted eggplant hummus with crackers.
- Sunday - Our standard farmers' market visit in the morning. Last week the smoothie/spring roll cart and the eggroll stand weren't there, so Sonny D and I had to find other morning snacks. He ended up sharing a hot dog with Grandma Cathy and some kettle corn with Grandpa Ken, while I ate a barbacoa beef taco with rice. Quite tasty, but I hope our favorites will be back this week. Later in the day we're going to our friends' house for a shop-at-home party.
Wanna Chat?
I turned off the 'leave a comment' feature, so if you want to share what you're thinking about this or anything else, drop me an email at jhk1013 (at) gmail.com. It's so much more cozy than a comment, plus we can have a real conversation!
Saturday, September 7, 2013
Bake a Cake in the Microwave

Inspiration
Angry Chicken 3-minute cakeIf you wanted to make this dairy-free, use non-dairy milk and substitute oil for the melted butter.
Ingredients
3-4 servings- 1/4 cup flour
- 1/4 cup sugar
- 2 tablespoons cocoa powder
- 1 egg
- 3 tablespoons milk (I used almond milk)
- 3 tablespoons melted butter (um, if you look in the pictures, mine wasn't melted, but at least was really soft)
- 1/2 tsp vanilla and instant esperesso powder (if desired)
- small handful of chocolate chips
Directions
Mix all the ingredients and pour in a shallow container. I used one of our pasta bowls. |
| I'd like to say my son helped me, but I made this mess all by myself. |
 |
| Smooth enough batter. |
 |
| Shallow dish |
 |
| I set out our bowls while we waited for the cake to cool. |
 |
| Side view. |
Verdict
This was pretty good straight out of the microwave, but it definitely got a bit chewier as it sat. Thin and dense, not really what I think of as a cake. More like a soft cookie.I had to cut up Sonny D's with his spoon before he could eat it since it was so dense. He ate it and seemed to enjoy it, but what kid doesn't like cake?
We ended up splitting this into four servings with one bit leftover that I put into a plastic bag and put in the fridge. I ate it the next night as a quick dessert after a quick stop at the grocery store. Good enough, but not really something I'm super excited to make again.
I think maybe one whole egg is too much for the size of the batch and that's why it's a bit thick and chewy. I wonder if skipping the egg like Chocolate-Covered Katie's vegan one-minute chocolate cake in a mug or this 5-minute wacky vegan microwave cake recipe would be better. Also it's possible my microwave over-cooked it since it's so high-powered. If I tried it again, I would skip the egg and cook it on a lower power setting.
Wanna Chat?
I turned off the 'leave a comment' feature, so if you want to share what you're thinking about this or anything else, drop me an email at jhk1013 (at) gmail.com. It's so much more cozy than a comment, plus we can have a real conversation!
Friday, September 6, 2013
Ambitious Project: Canning Wine Jelly
I was encouraged to make wine jelly when I went to Food Camp in April. There were several classes during each time slot and the final period of the day didn't have anything that interested me a whole lot, so I went with the "Jellies and Jams" class. The teacher focused on making wine jellies because he likes them a lot. I had never even heard of wine jelly before. As the class made a batch of jelly together and canned it, we also got to taste a couple jellies he had made previously. I loved his mulled wine jelly and wanted to try making my own version. It was also great to see how the canning process works so it wasn't so mysterious.
There are two types of canning, waterbath and pressure canning. The method you use depends on what you're canning, low-acid foods need to be pressure canned. Jellies and jams have a higher acidity, so you use the waterbath method for jellies and jams, so this is a great way to start canning since it doesn't require as much special equipment (mainly a pressure canner). Plus in my opinion, waterbath canning seems less scary than pressure canning.
I bought a 12 pack of cute little 4-ounce canning jars, liquid pectin, and a jar lifter at the grocery store, I think it might have cost me around $15 for these supplies. I picked the little jars because it allows me to share my jelly with more people.
I'm going to skip right to the end and tell you that I'm a goddess! I made and canned my own wine jelly! I'm so glad I conquered my fears and tried it out.
I made strawberry freezer jam a few years ago but I knew nothing about canning when I started this project, so I had to do a bit of research first. I was originally planning to sanitize my jars using the 'antibacterial' setting on our dishwasher, but I found conflicting info about using the dishwasher for that step. I think the reason some people tell you not to use the dishwasher is because they're talking about using a regular wash setting, which I would agree, a standard wash wouldn't be hot enough to sterilize the jars. I ended up sterilizing mine on the stovetop since it was easy enough to do while I was cooking up the jelly. Plus it keeps the jars hot and ready since they need to be warmed up when you fill them with hot jelly liquid. Plus then you'll put them back into the hot water to can them, so if you used it for sanitizing, it's already warmed up and waiting for the second round.
America's Test Kitchen homemade wine jelly
To access the recipe you need a free login for their website, so I'm not going to post it here.
I liked this recipe the best for a couple reasons. It comes from America's Test Kitchen and I trust them a lot. Plus it used a full bottle of wine (750 ml, approximately 3 1/4 cups), not more and not less. Other recipes I found used other amounts, like 4 cups, etc. I didn't want to have to open more than one bottle of wine and then try to figure out what to do with the rest. I like even amounts.
We have a wine rack in our basement with an assortment of wines so I had several to choose from. I don't drink wine so I don't really know a whole lot about what ones might be best for a jelly. I picked a local made wine, Botham Vineyards Big Stuff Red. I figured we could sacrifice one since we had two bottles of it. Plus it's only semi-dry and Husband Jeff likes dry wines like zinfandel and merlot, so he wouldn't miss it much. I originally bought it when some friends and I went out to the vineyard for a wine tasting. I bought it to have on hand if we had guests over for dinner, but now I was going to use it for breakfast instead.
Jelly: You take a bit of the wine and cook it to reduce it down quite a bit. I added a cinnamon stick to add a little extra flavor. My cinnamon stick was pretty old, so I don't know how much flavor it really added.
Canning: Meanwhile, to sanitize the jars I put them in a large pot of water and boiled them for 15 minutes.
It takes about 15 minutes to do both steps of sanitize the jars and to reduce the wine down, so this was a great place to combine jobs since you don't need to watch the jars, just get them to a boil and start the timer. You stir the wine occasionally, but while it was cooking I also pulled out the rest of the jelly ingredients and prep the jar filling area by laying down three old kitchen towels to protect the counter from the hot jars.
The cooking wine smelled good, but it was potent if you stood over it and inhaled while it was at a full boil.
Jelly: After the wine is reduced down, you take the rest of the bottle of wine and heat it in a separate large pot along with a lot of sugar. I think the general rule is that you use equal amounts of liquid and sugar, but I followed the recipe.
Canning: after the jars are sanitized, you turn off the heat and add the lids to the hot water, which warms up the rubber gaskets so they'll seal. Don't want to add them while it's still boiling, it can weaken them too much. And there's no point in sanitizing the rings since they're just to hold the lid in place while you can them, they don't actually touch the food product.
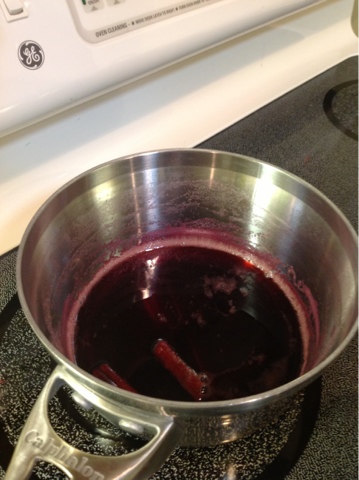
Jelly: After the rest of the wine and sugar comes to a boil, you add lemon juice, pectin, and a tiny dab of butter. The pectin is to make it gel up, I think the lemon juice is there for gelling as well, but I'm not sure. The butter is supposedly to reduce foaming. As you can see from the picture, foaming is an issue that you definitely want to prevent.
Canning: Once your jelly is ready, use the jar lifter to take the jars out of the hot water and fill them with the hot jelly liquid. I set mine on layered towels because I knew there would be a lot of drips and spills since I didn't have a canning funnel and I'm not the cleanest cook in the kitchen.
After filling the jars, if you get any jelly on the top edge of the jar you need to wipe it off because otherwise it can interfere with the seal.
Leave a little headspace (empty space between the food product and the top of the jar) as indicated by the type of food you're canning. For jams and jellies, it's 1/4 inch, close to the top thread. Add the warmed lids and screw the rings on tightly, but don't crank them down super hard since they need to release a little bit of air when they seal.
When you scrape down the pan to get the last of the jelly out, definitely taste it, that's your jelly!
Canning: Put the filled jars back into the big pot and probably add more water since they need to be covered by a good inch+ of water. Bring it to a boil and let it boil ("process") for 5 minutes if at sea-level. If above sea-level, check the chart included with your canning supplies to see how much time to add.
Once the processing time is up, turn off the heat and let them sit in the hot water for 5 more minutes. Once that's up, you use the jar lifter to pull them out of the water and put them on a cooling rack.
Oh my gosh, it was so satisfying to hear the jars pop as they sealed while I was taking them out of the canning water! That was neat because it means they're vacuum-sealed and they'll last for one year. If you have any jars that didn't seal, let them cool overnight and put them in the fridge. You've got one month to use them.
The jelly inside was still pretty thin and liquidy for several hours afterwards so I thought I might have done something wrong, particularly since I was kind of cavalier about measuring the sugar exactly, but in the morning it was solid like regular jelly. Success!
We've also got a bottle of sweet apricot wine in our wine rack, which would make another good batch of wine jelly. That would probably be nice with some actual fruit in it.
I don't know if I figured wrong, this was supposed to make 4 half pint jars (8 oz) so I figured that would be 8 quarter-pint jars (4 oz) but I had enough jelly left over to fill at least another two jars, if not more. I guess it's better to prep a couple more jars than you think you need, just in case. I ended up pouring the extra into a small Pyrex container and a freezer jelly container and we'll use those in the next month.
It was certainly worth it to do some research, I didn't know anything about canning when I started so it was good to know what I was doing since this isn't something where you can "wing it". Plus the instructor at Food Camp scared me a bit by saying that you need to follow established recipes, so I was hesitant to use just any 'ole recipe online since I didn't want to poison friends and family with my first foray into canning.
Also it's important to have the right supplies. I don't have a magnetic lid lifter to get the lids out of the hot water, but I've got a pair of plastic tongs from Ikea that worked perfectly. The jar lifter I bought was great, I couldn't have done that any other way. A canning funnel would be nice since it helps you fill the jars more cleanly, but it isn't a requirement.
There are two types of canning, waterbath and pressure canning. The method you use depends on what you're canning, low-acid foods need to be pressure canned. Jellies and jams have a higher acidity, so you use the waterbath method for jellies and jams, so this is a great way to start canning since it doesn't require as much special equipment (mainly a pressure canner). Plus in my opinion, waterbath canning seems less scary than pressure canning.
I bought a 12 pack of cute little 4-ounce canning jars, liquid pectin, and a jar lifter at the grocery store, I think it might have cost me around $15 for these supplies. I picked the little jars because it allows me to share my jelly with more people.
I'm going to skip right to the end and tell you that I'm a goddess! I made and canned my own wine jelly! I'm so glad I conquered my fears and tried it out.
Resources for Canning Basics
About.com How to sterilize jars
Ball Canning basics
 |
| The wine I used, Botham Vineyards "big stuff red". I think the kid on the label is now a young man. |
I made strawberry freezer jam a few years ago but I knew nothing about canning when I started this project, so I had to do a bit of research first. I was originally planning to sanitize my jars using the 'antibacterial' setting on our dishwasher, but I found conflicting info about using the dishwasher for that step. I think the reason some people tell you not to use the dishwasher is because they're talking about using a regular wash setting, which I would agree, a standard wash wouldn't be hot enough to sterilize the jars. I ended up sterilizing mine on the stovetop since it was easy enough to do while I was cooking up the jelly. Plus it keeps the jars hot and ready since they need to be warmed up when you fill them with hot jelly liquid. Plus then you'll put them back into the hot water to can them, so if you used it for sanitizing, it's already warmed up and waiting for the second round.
Inspiration & Ingredients
makes 8-10 four ounce jars of jellyAmerica's Test Kitchen homemade wine jelly
To access the recipe you need a free login for their website, so I'm not going to post it here.
I liked this recipe the best for a couple reasons. It comes from America's Test Kitchen and I trust them a lot. Plus it used a full bottle of wine (750 ml, approximately 3 1/4 cups), not more and not less. Other recipes I found used other amounts, like 4 cups, etc. I didn't want to have to open more than one bottle of wine and then try to figure out what to do with the rest. I like even amounts.
We have a wine rack in our basement with an assortment of wines so I had several to choose from. I don't drink wine so I don't really know a whole lot about what ones might be best for a jelly. I picked a local made wine, Botham Vineyards Big Stuff Red. I figured we could sacrifice one since we had two bottles of it. Plus it's only semi-dry and Husband Jeff likes dry wines like zinfandel and merlot, so he wouldn't miss it much. I originally bought it when some friends and I went out to the vineyard for a wine tasting. I bought it to have on hand if we had guests over for dinner, but now I was going to use it for breakfast instead.
Directions
I'm going to combine the steps for the jelly making along with the canning, but you don't have to can the jelly, it will last 1 month in the fridge in regular containers.Jelly: You take a bit of the wine and cook it to reduce it down quite a bit. I added a cinnamon stick to add a little extra flavor. My cinnamon stick was pretty old, so I don't know how much flavor it really added.
 |
| Portion of the wine with a cinnamon stick. |
 |
| Sanitizing the jars. |
It takes about 15 minutes to do both steps of sanitize the jars and to reduce the wine down, so this was a great place to combine jobs since you don't need to watch the jars, just get them to a boil and start the timer. You stir the wine occasionally, but while it was cooking I also pulled out the rest of the jelly ingredients and prep the jar filling area by laying down three old kitchen towels to protect the counter from the hot jars.
 | |
| Cooking up the small portion of wine. |
 |
| Bit of the wine reduced down and hopefully spiced. |
 |
| Rest of the bottle of wine with sugar. |
 |
| Jars are finished boiling (now sanitized) so I added the lids to the hot pot. |
 |
| The rest of the bottle of wine along with sugar, pectin, and lemon juice. |
After filling the jars, if you get any jelly on the top edge of the jar you need to wipe it off because otherwise it can interfere with the seal.
Leave a little headspace (empty space between the food product and the top of the jar) as indicated by the type of food you're canning. For jams and jellies, it's 1/4 inch, close to the top thread. Add the warmed lids and screw the rings on tightly, but don't crank them down super hard since they need to release a little bit of air when they seal.
 |
| Hot jelly in the jar, but not canned yet. |
 |
| Ooh, jelly! Tasty! |
 |
| Boiling to can. |
 | |
| Finished product, little jewels of canned jelly. |
The jelly inside was still pretty thin and liquidy for several hours afterwards so I thought I might have done something wrong, particularly since I was kind of cavalier about measuring the sugar exactly, but in the morning it was solid like regular jelly. Success!
Verdict
Holy crap, this was awesome! Now that I've tried it, I want to can more things! We've got jalapeños and other hot peppers in the garden that I want to turn into a spicy pepper jelly. For that I want to use a low-sugar recipe. I didn't know when I started, but if you use low-sugar pectin, you don't need to use as much sugar to make it gel up. You can also skip the commercial pectin by adding fruits that naturally have a lot of pectin, like apples or citrus peels, so maybe someday I'll be brave enough to try that.We've also got a bottle of sweet apricot wine in our wine rack, which would make another good batch of wine jelly. That would probably be nice with some actual fruit in it.
I don't know if I figured wrong, this was supposed to make 4 half pint jars (8 oz) so I figured that would be 8 quarter-pint jars (4 oz) but I had enough jelly left over to fill at least another two jars, if not more. I guess it's better to prep a couple more jars than you think you need, just in case. I ended up pouring the extra into a small Pyrex container and a freezer jelly container and we'll use those in the next month.
It was certainly worth it to do some research, I didn't know anything about canning when I started so it was good to know what I was doing since this isn't something where you can "wing it". Plus the instructor at Food Camp scared me a bit by saying that you need to follow established recipes, so I was hesitant to use just any 'ole recipe online since I didn't want to poison friends and family with my first foray into canning.
Also it's important to have the right supplies. I don't have a magnetic lid lifter to get the lids out of the hot water, but I've got a pair of plastic tongs from Ikea that worked perfectly. The jar lifter I bought was great, I couldn't have done that any other way. A canning funnel would be nice since it helps you fill the jars more cleanly, but it isn't a requirement.
Wanna Chat?
I turned off the 'leave a comment' feature, so if you want to share what you're thinking about this or anything else, drop me an email at jhk1013 (at) gmail.com. It's so much more cozy than a comment, plus we can have a real conversation!
Thursday, September 5, 2013
Sweet Potato in Your Pancakes
This isn't the type of potato pancake made of shredded potato, this is a standard American breakfast pancake. I didn't make the pancakes from scratch, but rather added cooked and mashed sweet potato to Kodiak Cakes pancake mix.
When I got home and ready to make dinner, I pulled out the sweet potato and hoped that putting it in the container while still hot would make it easier to peel, but it didn't. So I used a paring knife and peeled the skin off and cut it into medium-sized chunks. Then I filled the container with water and cooked it for another couple minutes in the microwave until a fork went into it easily. I drained the water out and mashed the sweet potato chunks with a fork until it was a pretty smooth mash.
Normally I cook my sweet potatoes in the microwave without water but they can get kind of stringy. Using this method of cutting it up and cooking it in water ended up nice and smooth. I liked it a lot and will definitely do it again.
We stirred in the mashed sweet potato and I checked the thickness of the batter. It seemed a little thick, so I added a bit more water until it looked right.
I use a 1/4 cup measuring cup to portion out pancake batter, and it still seemed a little thick, so I used the bottom of the measuring cup to spread the batter out on the electric skillet.
Cook like normal.
Sonny D ate a couple pancakes without hesitation. Husband Jeff and I liked them as well.
With butter and syrup on these pancakes, you couldn't really tell the sweet potato was there since pancake syrup is really strongly flavored. For my last one I used just butter and a spray of whipped cream in a can and it was good, a perfect light touch of sweetness. Plus this is a great way to add another serving of vegetables to your day.
 |
| Pancakes on the griddle. |
Sweet Potato Cookery
I cooked a sweet potato in the microwave in two stages. I left it wet from washing and poked holes with a fork and cooked it for one minute. Flipped it over and cooked for another minute. Then put it in a container with the lid on and let it cool in the fridge for a few hours because I had to get back to work.When I got home and ready to make dinner, I pulled out the sweet potato and hoped that putting it in the container while still hot would make it easier to peel, but it didn't. So I used a paring knife and peeled the skin off and cut it into medium-sized chunks. Then I filled the container with water and cooked it for another couple minutes in the microwave until a fork went into it easily. I drained the water out and mashed the sweet potato chunks with a fork until it was a pretty smooth mash.
Normally I cook my sweet potatoes in the microwave without water but they can get kind of stringy. Using this method of cutting it up and cooking it in water ended up nice and smooth. I liked it a lot and will definitely do it again.
Un-Recipe
I added 1 mashed sweet potato to a batch and a half of Kodiak Cakes pancake mix (1 1/2 cups mix). That's my new favorite pancake mix. Yes, I know it's probably pretty easy to make your own pancakes from scratch, but I like it since it's whole grains and super-quick. Plus it doesn't need any additional ingredients other than water, there's no added fat or oil. |
| Cooked and mashed sweet potato into pancake mix. |
 |
| Sonny D stirring the mash into the batter. |
 |
| Batter closeup. |
I use a 1/4 cup measuring cup to portion out pancake batter, and it still seemed a little thick, so I used the bottom of the measuring cup to spread the batter out on the electric skillet.
 |
| Waiting for bubbles to break and stay. |
Verdict
Sonny D ate a couple pancakes without hesitation. Husband Jeff and I liked them as well.
With butter and syrup on these pancakes, you couldn't really tell the sweet potato was there since pancake syrup is really strongly flavored. For my last one I used just butter and a spray of whipped cream in a can and it was good, a perfect light touch of sweetness. Plus this is a great way to add another serving of vegetables to your day.
Wanna Chat?
I turned off the 'leave a comment' feature, so if you want to share what you're thinking about this or anything else, drop me an email at jhk1013 (at) gmail.com. It's so much more cozy than a comment, plus we can have a real conversation!
Subscribe to:
Posts (Atom)