
There are two types of canning, waterbath and pressure canning. The method you use depends on what you're canning, low-acid foods need to be pressure canned. Jellies and jams have a higher acidity, so you use the waterbath method for jellies and jams, so this is a great way to start canning since it doesn't require as much special equipment (mainly a pressure canner). Plus in my opinion, waterbath canning seems less scary than pressure canning.
I bought a 12 pack of cute little 4-ounce canning jars, liquid pectin, and a jar lifter at the grocery store, I think it might have cost me around $15 for these supplies. I picked the little jars because it allows me to share my jelly with more people.
I'm going to skip right to the end and tell you that I'm a goddess! I made and canned my own wine jelly! I'm so glad I conquered my fears and tried it out.
Resources for Canning Basics
About.com How to sterilize jars
Ball Canning basics
 |
| The wine I used, Botham Vineyards "big stuff red". I think the kid on the label is now a young man. |
I made strawberry freezer jam a few years ago but I knew nothing about canning when I started this project, so I had to do a bit of research first. I was originally planning to sanitize my jars using the 'antibacterial' setting on our dishwasher, but I found conflicting info about using the dishwasher for that step. I think the reason some people tell you not to use the dishwasher is because they're talking about using a regular wash setting, which I would agree, a standard wash wouldn't be hot enough to sterilize the jars. I ended up sterilizing mine on the stovetop since it was easy enough to do while I was cooking up the jelly. Plus it keeps the jars hot and ready since they need to be warmed up when you fill them with hot jelly liquid. Plus then you'll put them back into the hot water to can them, so if you used it for sanitizing, it's already warmed up and waiting for the second round.
Inspiration & Ingredients
makes 8-10 four ounce jars of jellyAmerica's Test Kitchen homemade wine jelly
To access the recipe you need a free login for their website, so I'm not going to post it here.
I liked this recipe the best for a couple reasons. It comes from America's Test Kitchen and I trust them a lot. Plus it used a full bottle of wine (750 ml, approximately 3 1/4 cups), not more and not less. Other recipes I found used other amounts, like 4 cups, etc. I didn't want to have to open more than one bottle of wine and then try to figure out what to do with the rest. I like even amounts.
We have a wine rack in our basement with an assortment of wines so I had several to choose from. I don't drink wine so I don't really know a whole lot about what ones might be best for a jelly. I picked a local made wine, Botham Vineyards Big Stuff Red. I figured we could sacrifice one since we had two bottles of it. Plus it's only semi-dry and Husband Jeff likes dry wines like zinfandel and merlot, so he wouldn't miss it much. I originally bought it when some friends and I went out to the vineyard for a wine tasting. I bought it to have on hand if we had guests over for dinner, but now I was going to use it for breakfast instead.
Directions
I'm going to combine the steps for the jelly making along with the canning, but you don't have to can the jelly, it will last 1 month in the fridge in regular containers.Jelly: You take a bit of the wine and cook it to reduce it down quite a bit. I added a cinnamon stick to add a little extra flavor. My cinnamon stick was pretty old, so I don't know how much flavor it really added.
 |
| Portion of the wine with a cinnamon stick. |
 |
| Sanitizing the jars. |
It takes about 15 minutes to do both steps of sanitize the jars and to reduce the wine down, so this was a great place to combine jobs since you don't need to watch the jars, just get them to a boil and start the timer. You stir the wine occasionally, but while it was cooking I also pulled out the rest of the jelly ingredients and prep the jar filling area by laying down three old kitchen towels to protect the counter from the hot jars.
 | |
| Cooking up the small portion of wine. |
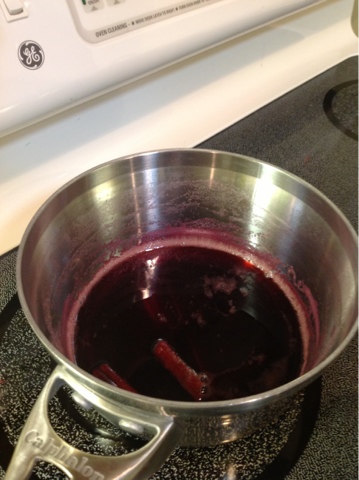 |
| Bit of the wine reduced down and hopefully spiced. |
 |
| Rest of the bottle of wine with sugar. |
 |
| Jars are finished boiling (now sanitized) so I added the lids to the hot pot. |
 |
| The rest of the bottle of wine along with sugar, pectin, and lemon juice. |
After filling the jars, if you get any jelly on the top edge of the jar you need to wipe it off because otherwise it can interfere with the seal.
Leave a little headspace (empty space between the food product and the top of the jar) as indicated by the type of food you're canning. For jams and jellies, it's 1/4 inch, close to the top thread. Add the warmed lids and screw the rings on tightly, but don't crank them down super hard since they need to release a little bit of air when they seal.
 |
| Hot jelly in the jar, but not canned yet. |
 |
| Ooh, jelly! Tasty! |
 |
| Boiling to can. |
 | |
| Finished product, little jewels of canned jelly. |
The jelly inside was still pretty thin and liquidy for several hours afterwards so I thought I might have done something wrong, particularly since I was kind of cavalier about measuring the sugar exactly, but in the morning it was solid like regular jelly. Success!
Verdict
Holy crap, this was awesome! Now that I've tried it, I want to can more things! We've got jalapeños and other hot peppers in the garden that I want to turn into a spicy pepper jelly. For that I want to use a low-sugar recipe. I didn't know when I started, but if you use low-sugar pectin, you don't need to use as much sugar to make it gel up. You can also skip the commercial pectin by adding fruits that naturally have a lot of pectin, like apples or citrus peels, so maybe someday I'll be brave enough to try that.We've also got a bottle of sweet apricot wine in our wine rack, which would make another good batch of wine jelly. That would probably be nice with some actual fruit in it.
I don't know if I figured wrong, this was supposed to make 4 half pint jars (8 oz) so I figured that would be 8 quarter-pint jars (4 oz) but I had enough jelly left over to fill at least another two jars, if not more. I guess it's better to prep a couple more jars than you think you need, just in case. I ended up pouring the extra into a small Pyrex container and a freezer jelly container and we'll use those in the next month.
It was certainly worth it to do some research, I didn't know anything about canning when I started so it was good to know what I was doing since this isn't something where you can "wing it". Plus the instructor at Food Camp scared me a bit by saying that you need to follow established recipes, so I was hesitant to use just any 'ole recipe online since I didn't want to poison friends and family with my first foray into canning.
Also it's important to have the right supplies. I don't have a magnetic lid lifter to get the lids out of the hot water, but I've got a pair of plastic tongs from Ikea that worked perfectly. The jar lifter I bought was great, I couldn't have done that any other way. A canning funnel would be nice since it helps you fill the jars more cleanly, but it isn't a requirement.